
Some links included here may be affiliate links, meaning we may earn a small monetary bonus from referring you to them. In no way does this increase the price you pay.
Explaining how you did something via text can be pretty difficult, especially if you’re working with someone who isn’t as tech savvy – hi mom! 😉
When I need to show clients how to add me to their certain platforms it’s SO much easier when I can just send them a video showing how to do that. Otherwise I’m physically typing out each instruction, or explaining it over the phone without visuals. It’s just not ideal.
Screen recording is also super valuable when it comes to recording online courses, video tutorials, webinars, and more. Being able to capture a part of my computer screen and record a video helps them follow along much better than just text and pictures.
I’ve tried out some of the best screen recording software on the market and wanted to share what I’ve found through my research.
The ways I’ve organized this list takes into account the pricing, which operating systems they work with, and the features included as well.
What is the Best Screen Recording Software?
Here are the screen capture software tools I was able to test and review for you.
1. Screencast-o-Matic
Best Screen Recorder for Video Creators
One of the most popular screen recorders out there, Screencast-O-Matic has a ton of features.
- Platforms Supported: Pretty much everything – Windows, Mac, iOS, Android, and Chromebooks

Screencast-o-matic Pricing
There are 3 plans you can sign up for with Screencast-o-matic:
The Free Plan
The free plan is pretty basic in terms of functionality. You can take screenshots, record your computer screen, add captions, save it to your computer or Google Drive, YouTube or some social media platforms. That’s about it.
But if you’re just looking to record your computer screen, this is more than enough – unless you want to record for more than 15 minutes, then you’ll need to upgrade.
Deluxe Plan ($1.65 per month)
The deluxe plan is where this software gets really interesting. You can draw while you record, create GIFs, access to their full music library, import videos to add into your own screen recordings, add shapes, arrows and host your videos on their platform. You also get video editing features with this plan.
Premier Plan ($4 per month)
The Premier Plan includes everything in the deluxe plan, but also includes custom video players, your own branded ad-free playback pages, 100GB bandwidth each month. The really cool new feature they offer is auto transferring mobile recordings to the desktop editor – so you can record your phone screen and transfer it over to add into your main recording.
Screencast-o-matic also has integrations for LMS platforms as well, like Google Classroom, Canvas, and Blackboard.
Who It’s Best For:
Screencast-o-matic is amazing for teachers, or anyone in the education industry who need to teach students virtually. Of course, this also includes course creators who are looking to create more interactive and interesting video lessons.
Pros:
- Lots of customization options
- Ability to add photos, music, animations and more to your videos
- You can back up videos online
- Integrates with Google Drive, Vimeo, and Dropbox
- Can record and export in mp4, AVI, and FLV file formats
- Even if you need to upgrade to get some of the features, this only costs around $20 for an entire year for the Deluxe plan.
Cons:
- While it has a free plan, the features are really basic and you cannot get rid of the watermark that shows their branding.
- You can only record for 15 minutes at a time on the free plan.
2. Camtasia

Camtasia is kind of like the gold standard of video recorders. It comes with all kinds of features you wouldn’t expect, but soon realize you don’t want to live without.
But it doesn’t come without the price tag. It comes in at $249, but you do get free upgrades for the following years version.
Their support is great, and they offer a lot of tutorials, as well as other power users who create tutorials on their forums.
It’s compatible with both Windows and Mac, so you’ll be able to use it on either device type. You can get a free trial here before paying the big bucks.
3. Movavi

Movavi is a great tool that allows you to capture your screen, record your screen, and edit the file after recording.
It works on both Windows and Mac computers. They do offer a free version but you aren’t able to record with sound or edit your screenshots. You also will notice a watermark on your videos and recordings.
Movavi Pricing
There are 3 pricing plans with Movavi.
- Screen Recorder for Mac – $39.95
- Screen Recorder & Video Editor for Mac – $64.95
- Video Suite for Mac – $79.95
While these may seem higher than the other options on this list, these prices are for lifetime licenses, meaning you pay once and have it forever.
The mid-tier license is probably good enough for most, however the video suite gives you all the features, including a video file type recorder.
4. Snagit

Snagit is more of a screenshot capturer (is that a thing?), but you can make GIFs out of your recordings which is great.
I’m including it on this list because it’s got the support and stability of Camtasia, with only a $49 price tag.
If you’re not looking to record long videos, Snagit might be the option for you.
5. Bandicam
Bandicam is a very advanced screen recorder in terms of the features it includes. However, if you’re an Apple person like I am, keep scrolling.
- Platforms Supported: Windows
Bandicam Pricing
- Free or $39.95 for 1 license
- Features:
- You can record 2D and 3D games, as well as live streaming, record your Skype chats, and record yourself as well as the screen at the same time.
Pros:
- You get all their screen recording features for free. However, if you want to remove the watermark (the Bandicam logo) from the corner of your videos or record longer than 10 minutes, you will need to purchase a license.
Cons:
- Only available for Windows users
- Can only record for 10 minutes at a time with the free version
6. OBS Studio
Best for Live Streamers & YouTubers
I call this the best option for Twitch and YouTube streamers, but there is a caveat. If you’re not “techy” or willing to learn how to implement this platform, you’re going to want to try something else.
There is quite a big learning curve with OBS Studio.
While it’s most used for live streaming and recording videos, you can absolutely use OBS for screen recording.
- Platforms: Windows, macOS, Linux
- Price: Free
Pros:
- Can be used for screen recording, live streaming, mixing audio, and to create your own TV or radio type show
- You can set hotkeys on your computer to change sources, or add sound effects and camera changes with the click of one key.
Cons:
- There is a pretty giant learning curve when it comes to OBS, but it has a TON of functionality that you can use…for FREE.
7. CloudApp
I was introduced to CloudApp through Appsumo way back in the day. It’s one of those tools that you’re happy you ended up buying because you get a lifetime license instead of having to pay for the premium features.
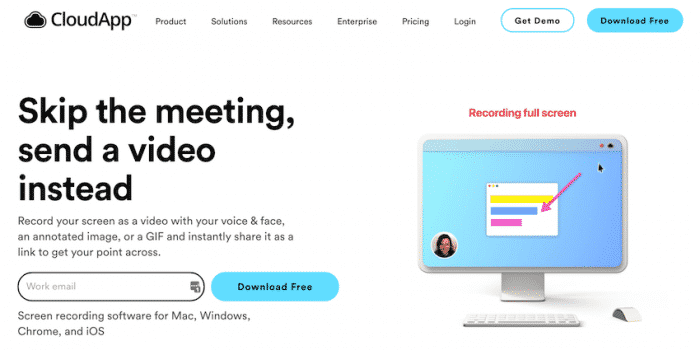
CloudApp was the first tool I was introduced to that allowed you to create GIFs from your own recordings. While this feature is pretty widely available nowadays, the functionality with CloudApp is great.
CloudApp does have a free plan that allows you create and share videos, GIFs, and annotated screenshots. However, their free plan only lets you record for up to 90 seconds. If you look at some of the other tools on this list, that will seem disappointing since most give you 10 or 15 minutes of free recording.
The awesome part about CloudApp is that once you stop recording a video, it will automatically copy that share link for you so you don’t have to wait for the video to upload, go to the share page, copy the link, and THEN paste it. You can simply navigate to your email or Slack window and paste away!
CloudApp Pricing
- Free Plan – $0 per month and allows for 90 second recordings and access to your last 20 files
- Pro Plan – $9.95 per month and includes unlimited recording, advanced analytics, search functionality, video annotations, calls to action, and do-not-disturb mode (so you don’t accidentally get a text that popups up on the side of the screen while you’re recording).
- Team Plan – $8 per month per user (minimum of 3 users) and has team folders you can share, and priority support.
8. DemoCreator from Wondershare (Filmora)
The screen recorder from Wondershare is a great option.
DemoCreator works with both Windows and MacOS and is what I would call the designers screen recorder. The interface is very well designed and easy to use even if you’re not
Formerly called Filmora Scrn, DemoCreator is the new name of this powerful tool. You can annotate your videos, add text, and more with this recording software.

You can start with their trial version, although the videos will be watermarked with their branding. You can use their quick capture options to record both your webcam and your screen together.
Best Free Screen Recording Software
There are a lot of free versions you can use as well. However, the best one I’ve found is called Loom.
9. Loom
Loom does work off a freemium model, which means you can get started for free but if you want their advanced features you will need to buy a subscription. I love Loom so much that I did buy the paid plan.
Screen Recording Software – FAQs
Here are a few of the more common questions you might have when selecting which screen recording software to use. I’ll add more of these as I get them in the comments below.
How to Choose a Screen Recorder?
There are a lot of features that may come with different screen recorders, so it can be hard to choose. But most people will need the ability to talk while they navigate their screen, the ability to edit a video, share a link to their recording, and upload it to their website or YouTube, etc.
Most of the options in the list above have these features, but you do want to keep an eye out for them as some free versions don’t.
How to Record Your Phone Screen
I have used QuickTime to record my phone in the past.
This works for iPhones, but I’m not positive it would work with Android. Simply plug in your iPhone with your charging cord, and you should be able to open QuickTime, then click record screen and choose your phone instead of the webcam.
Honestly, at the end of the day most of these platforms have similar features. It’s going to come down to personal preference and which ones fit well within your workflow.